Website Instructions
Add Techs
- Click on TECHS tab located at top of website
- Click NEW TECHNICIAN button
- Fill out form and click Submit button
Add Customers
- Click on ADD CUSTOMER button located below charts window on Home page
- Fill out form and click Submit button
Once Customer is added, you’ll be redirected to the Customer View page where you can:
- Edit Customer info
- Add Down Payments
- Add new jobs to the Customer
Each job represents a vehicle under a Customer which enables the ability to create multiple jobs under a Customer for multiple vehicles
Create Jobs
After adding customer:
- Click on link – “Create New Job”
- Fill out form and click Submit button
A Job number is created automatically by the system. If you prefer to enter your own numbering system the field is editable.
You can also create a new job by:
- Click on View button for particular Customer
- At top of page below the customer’s phone number click on + button
- Fill out form and click Submit button
View Customer Detail
When a work order is created the Customer View page is updated with options to:
- Create a new Estimate
- Add Parts to the Order sheet
- Edit the Work Order
- Delete the Work Order
Download & Send Pictures
From the mobile app the technicians can attach up to 3 pictures when scanning out of a work order. The picture attachments will be found in the same location in the timecard table with the scan out data.
- Go to Customer and click View page
- Scroll down to Timecard to find the scan out data
- In Actions column click on PICS button
In the Pictures page the admin user will find and be able to manage the pictures sent from the mobile app on scan out. The options include:
- View pictures sent from mobile app in preview format
- Download pictures to local machine
- Automatically open email, attach selected pictures, and send to Customer
- Upload other pictures from local machine and add to email
Enroll in Clock In | Out
This function prevents technicians from Scanning in to Work Orders if they are not Clocked in. If the tech is not Clocked In they will not be able scan into a work order with the mobile apps.
- To enroll a technician and enforce the clock in rule go to the TECH page and click on Edit button
- Scroll to bottom of page and check the ENROLL IN CLOCK IN | OUT box
Download Mobile Apps
The Klokwork mobile apps were created so the technicians can scan the QR code when they begin and end work on the vehicle. With this technology any manual punch clock or punch card systems can be eliminated.
The mobile apps work on iPhone and Android smartphones.
If you are downloading the app to an iPhone, iPad or iTouch you must be up-to-date with the latest iOS operating system. If necessary here is a link with simple directions for installing the latest iOS to your device:
https://support.apple.com/en-us/HT204204
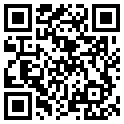
Scan To Download

iPhone
Link to get iOS app from iTunes:
https://itunes.apple.com/us/app/klokworkauto/id933307769?mt=8&uo=6&at=&ct=
Android
Link to get Android app from Google Play:
https://play.google.com/store/apps/details?id=com.kw2.klokworkauto
App Instructions
Initial Setup
- Download to mobile device
- Accept license agreement
- Enter user name and password
- Enter the data communication address supplied into the Path field.
Scanning QR Code With App
- Open Klokwork app on iPhone or Android smartphone
- Log in (you will only be required to log in on the first time)
- Click SCAN QR CODE button
- With the phone's camera focus on the QR code on vehicle. You will see a confirmation message when the QR code is successfully scanned.
- When scanning OUT of a job the user will see a text box. In the text box they can type or dictate work related information they just performed during the time period. Entering work detail is optional so the user can leave black if they want.
Attaching Pictures to Scan Out
- Click Scan Out button
- Click Attach Image button
- Take picture (picture automatically attaches to scan out)
- Click Yes to Confirm Scan Out
For each scan out the technician can add up to 3 pictures. The technician will be able to view the picture from the mobile app or delete it before attaching to scan out.
